

<
Accepting payment via PayPal
Neerav Mehta
Founder & CEO
This is tutorial #9 in the Drupal Commerce tutorial series. In the previous article, we enabled Authorize.Net Payment Gateway for the site. This article will focus on PayPal.
PayPal is easily the world's most preferred payment solution. Drupal has several competent modules that can handle PayPal transactions. In this article, we will be downloading, enabling and configuring the Commerce PayPal module.
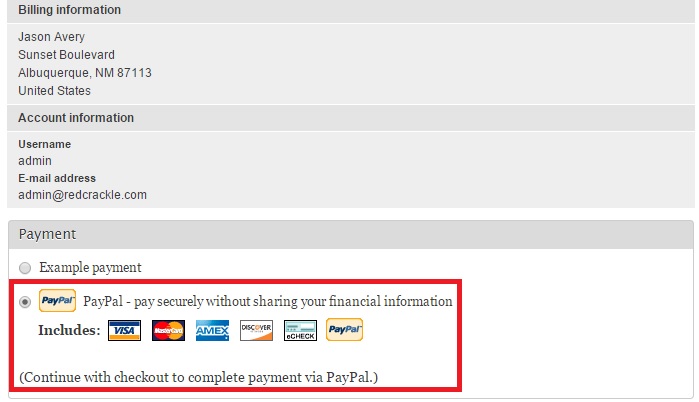
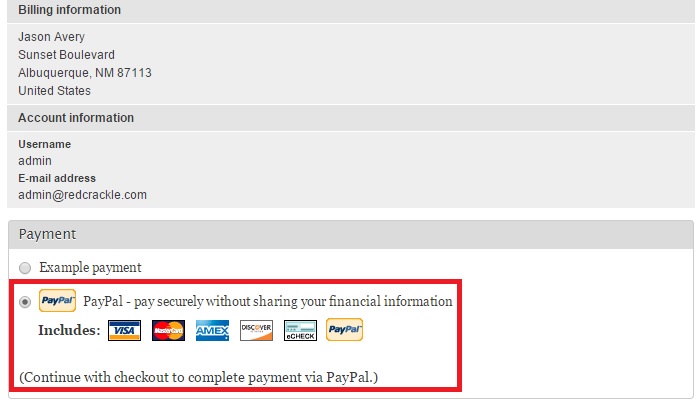
By the time you are the done with this article, you will be able to view the PayPal options as part of your checkout process just like in the screen below:
Let’s get started. First, you will need a PayPal account. Visit here in case you don’t have one.
Let’s now proceed to install Commerce PayPal. Type www.drupal.org/project/commerce_paypal in your browser window.
Download the latest version of the tar.gz file to your modules folder. Unzip and enable it in Administration.
Go to “Administration” -> “Modules”. Search for “PayPal”. Make sure PayPal and PayPal WPS are enabled before proceeding.
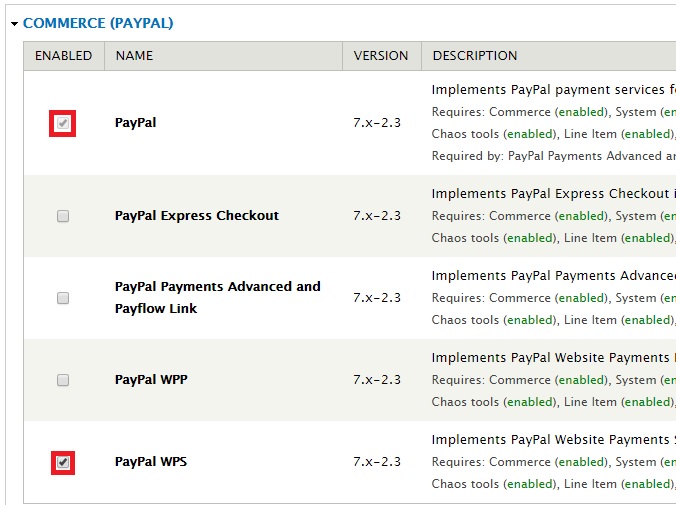
Click “Save configuration” at the bottom of the page:
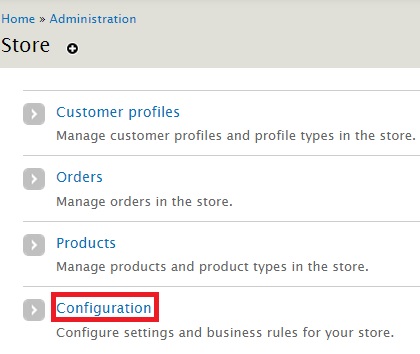
Click “Store” on the top-level menu:

Click “Configuration”:
Click “Payment methods”:
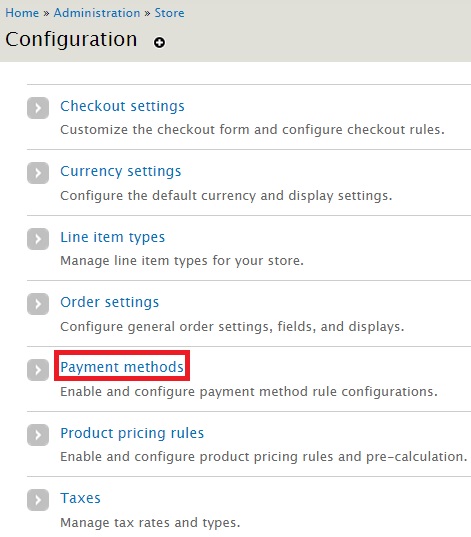
You will find “PayPal WPS” listed in the “Disabled payment method rules” table:
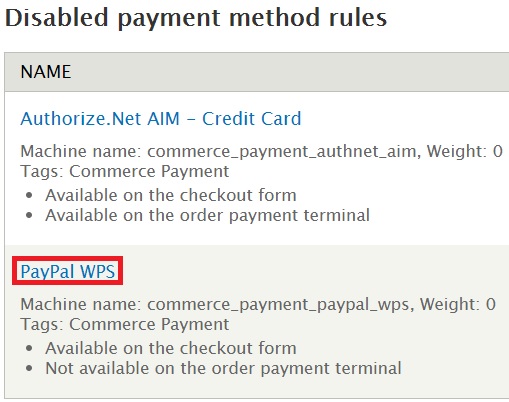
Click “Edit” on the right of “PayPal WPS”:

On the new page, look out for the table called “Actions”. You will find “Enable payment method: PayPal WPS” listed under it. Click “Edit”:

In the new page, you will come across a lot of settings. We will deal with them one by one.
The first box allows you to choose a Data selector
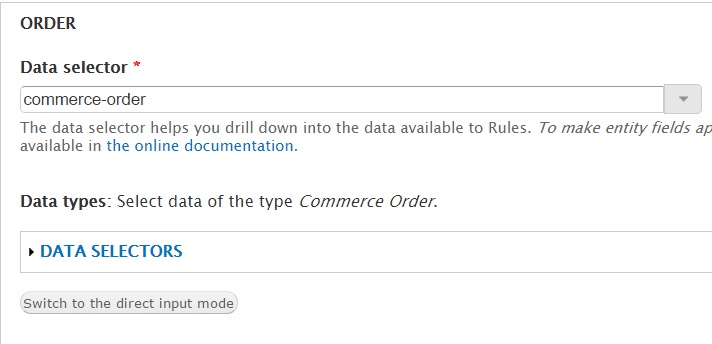
Data selectors are associated with the rules created by you. You can specify a data selector from the dropdown to make use of a rule. I have left mine as default.
Under the “PAYMENT SETTINGS” section, you will come across the following fields:
- Enter the email address used by you to create a PayPal account:

- Specify the currency your PayPal account is associated with. By default, the value provided is USD:

- Tick the box against "Allow transactions to use any currency in the options list above" if you want your e-commerce store to accept and convert all currencies to the currency of your choice:

- Select the country of your choice in the dropdown below. It should be the country you wish to do business in (where a majority of your target audience resides):

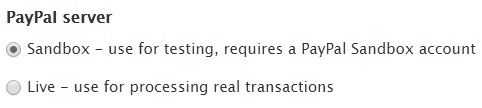
- Are you planning to test the payments in a demo environment? If yes, choose “Sandbox - use for testing, requires a PayPal Sandbox account” under “PayPal server”. Go for “Live - use for processing real transactions” only if you are launching the site and need real-time results.
- Under Payment action, you can decide whether you want to process payment immediately or authorize the payment so that it can be collected at a later stage. Choose any of the options below:

- IPN represents Instant Payment Notifications (IPNs). Drupal's default setting is “Log notifications during IPN validation and processing”. You may select “Log notifications with the full IPN during validation and processing (used for debugging)” if you want to debug any PayPal errors that may arise during the payment process.

- Enter a list of email addresses associated with your PayPal account. IPNs will be sent to this address:

-
Select “Create a billing profile…” if you need to create a customer billing profile featuring his address details.
-
Select “Show a message…” if you want the message Continue with checkout to complete payment via PayPal to be displayed during the shopper select PapPal WPS as a payment option.

Click “Save” at the bottom of the page to save your configuration.
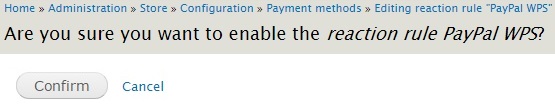
Follow this path once again: “Store” -> “Configuration” -> “Payment methods”. Click "enable" next to “PayPal WPS” under “Disabled payment method rules”:

You will get the following screen. Click “Confirm”.
You have now successfully configured PayPal for your machine.
Head over to your site’s check out process. You will find options to opt for PayPal. Here is how it will look:
Next: Adding VAT Tax To The Bill

Neerav Mehta
Founder & CEO
Neerav Mehta is the Founder & CEO of Red Crackle. With sterling qualities, Neerav’s technological acumen is firing a generation of progressive companies on the digital path. With an undergraduate degree in Electrical Engineering from India's most prestigious institution IIT Bombay and having spent seven years developing and contributing to the launch of AMD's innovative line of computer products, Neerav founded Red Crackle where he is lauded for his dynamic and innovative genius.



Let’s get you started!